To me, summer means long treks into the backcountry. As any serious outdoors adventurer can attest, there isn't a single "correct" way to do that, although there are some guidelines worth adhering to. Those aside, outdoor exploration is a realm of self-sufficiency, an endeavor where tricks are acquired through conversation and experience.
Long days outside means there's no easy way to get food or water. A small, pump-style water filter makes filling up on the trail easy. The filter is lighter than carrying several liters of water, and the streams here are ice cold year-round.
For food, I rely on things that don't go bad. I also consider weight, as a day spent hiking a dozen miles over several summits requires energy, and food isn't necessarily light. That's where dehydrating comes in. The early spring months are a great time to stock up on dried food, and since the prep time is minimal it's easy to do yourself.
Dying to dry
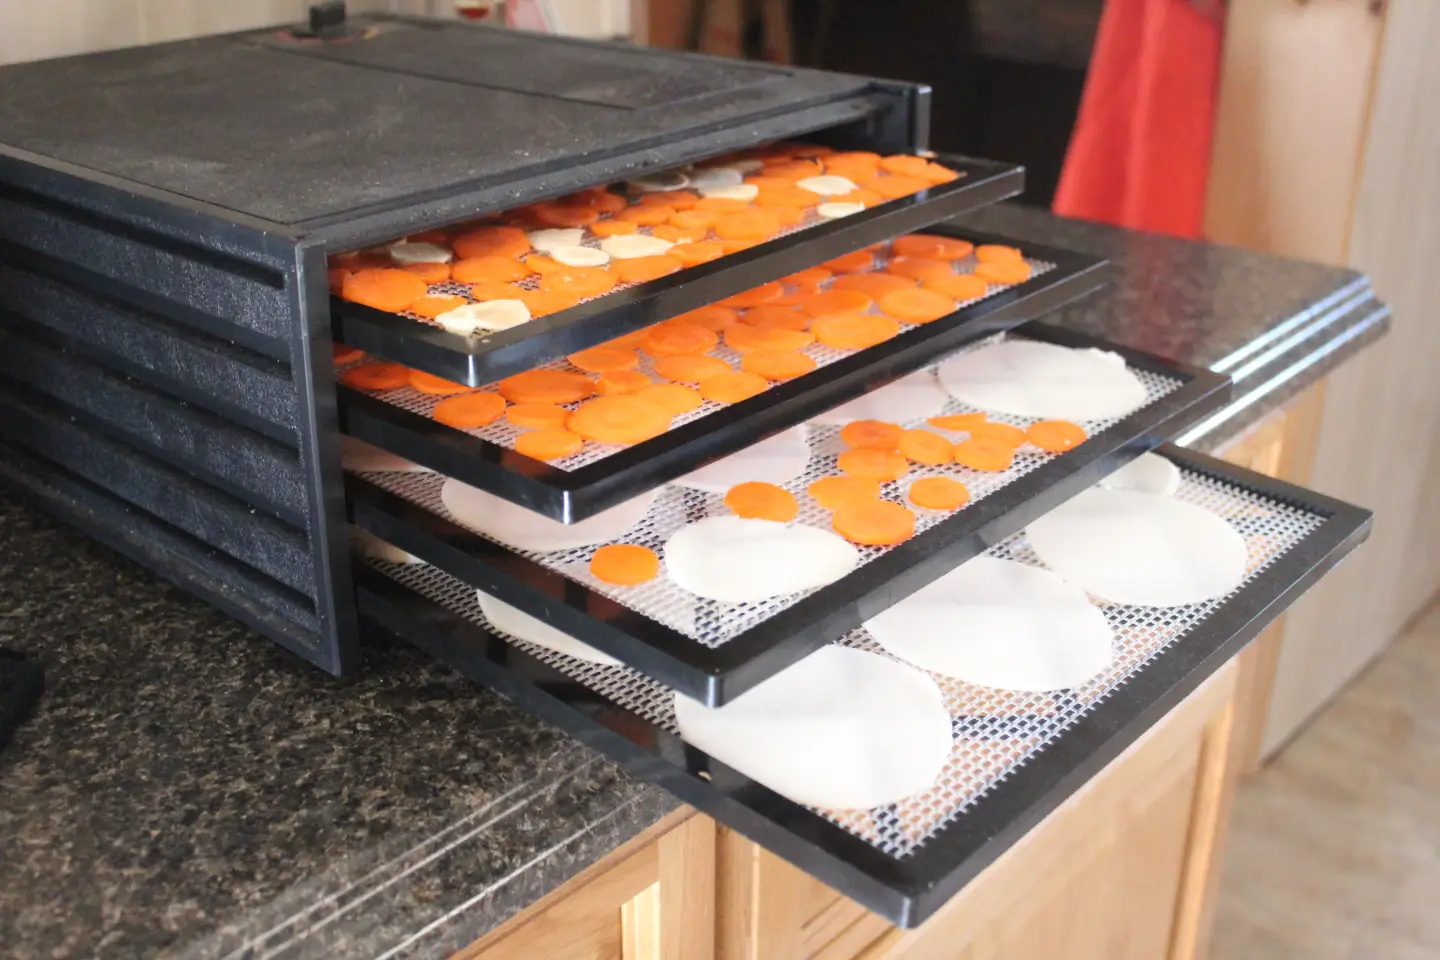
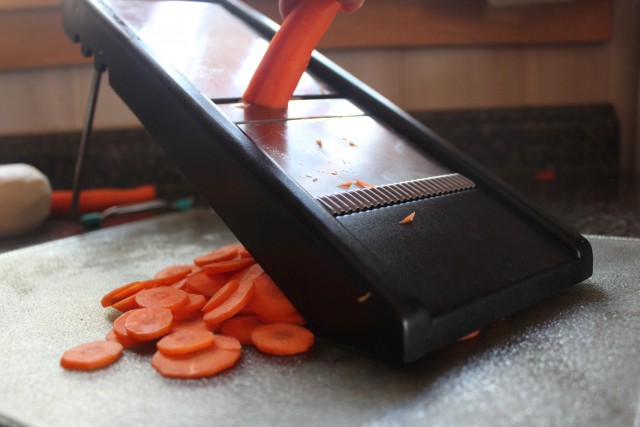
To dry food, all you really need is a food dehydrator and a couple of basic kitchen items, like a mandoline or power slicer, which will ensure everything is the same thickness. That's important to get uniformly dried results.
There are differing opinions on how to prep fruits and vegetables for dehydrating. Some foods, like potatoes, always require some prep before being dried. Typically, blanching — that's a brief plunge in boiling water — or steaming is all that's necessary. But there is a debate about whether or not to prep other foods, like carrots and bananas, and it seems to center around two things: How old your machine is and whether you care about what the finished product looks like.
The age of the machine seems to be the main issue. Older machines took longer to fully dry foods, so many iterms had to be pre-treated to prevent them from spoiling before they were fully dried. Ascorbic acid or sodium bisulfate dissolved in water was often used.
Lightly colored items, like apples, tend to brown a bit when dried unless they're treated. The browning doesn't affect anything but the look of the apple chip, which is why food purists opt not to use them. And therein lies the debate: If pre-treatment isn't necessary, why do it?
A chip on my shoulders
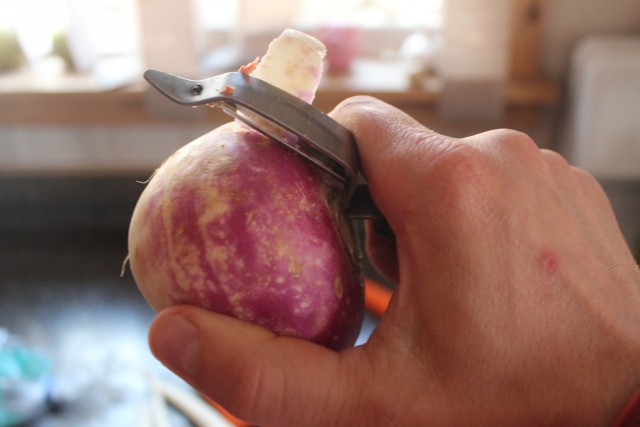
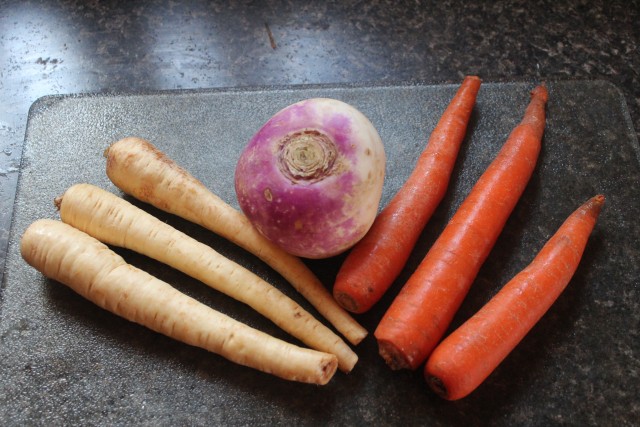
I've never been a big fan of potato chips, but veggie chips are a totally different thing. They don't taste exactly like the veggies they're made from. Eating a beet chip isn't the same as taking a bite out of a beet. The sugar-filled root vegetable actually has a sweet taste in chip form. I've found things like carrots, turnips, and radishes to have a similar sweet taste when dried.
Veggie chips are easy to make. Simply slice them to the same thickness — no thicker than a quarter inch is best — and lay them on the tray of the food dehydrator so they aren't overlapping. Flipping or rotating the food isn't necessary; the spaces in the trays will alleviate that. Set the temperature to 125 degrees and walk away for four to eight hours, depending on the humidity in the air. The higher the humidity, the longer foods will take to dry. The best way to gauge humidity is to check your local weather online. There should be a humidity percentage on the web page that you can use.
The nice thing about dehydrating is it isn't tricky to do successfully. Much like crock pot cooking, there's a huge margin of error. In other words, things don't go from almost done to burnt in 10 seconds like they do when stir frying. Keep an eye on the food and set a timer. When it's dry, it's done. It's as simple as that.
Get creative
I love veggie chips, but that's not all a food dehydrator can do. Fruits can be sliced or cubed, whole green beans cut to uniform length make a great dried snack, and fruit roll-ups can be made by pureeing fruit, spreading it on a nonstick sheet, and drying it like the chips.
And then there's jerky. Chewy, delicious jerky. It's easy to make. Simply whip up a marinade, slice the meat — beef, chicken, venison, fish, ham, turkey — and marinate it overnight. The next day, pull the strips out of the marinade, let the excess liquid drip off, lay them on the trays, and dehydrate at 155 degrees until dry.
Don't be intimidated by the marinade. The basic components are water, salt, and some kind of flavoring. Liquid smoke adds a great taste to the meat, as does cracked pepper, garlic, ginger, and Tabasco sauce.
You can go classic
Marinate 3 to 4 pounds of meat in the following:
- 1/2 cup tomato sauce
- 1/4 cup soy sauce
- 1/4 cup Worcestershire sauce
- 1 tsp. onion powder
- 1 tsp. garlic powder
- 1/2 tsp. cracked pepper
- 1/2 tsp. liquid smoke
Or try something different
- 1 cup soy sauce
- 2 crushed garlic cloves
- 2 tsp. ground ginger root
- 2 tbsp. brown sugar
- 1 tsp. pepper
- 1/2 tsp. salt
The best method is to follow a recipe then adjust accordingly until it suits your taste. Dried meat is an excellent, lightweight option for long day hikes and backpacking trips. Spend a few nights making batches in the spring and you'll have plenty for your summer hikes.
A full spread?

I haven't delved into the world of making dehydrated main courses yet, but I know it can be done. I've seen recipes for things like dehydrated beef stroganoff and pad Thai that probably taste like a thick slice of heaven around a backcountry campfire. It makes sense — dehydrated foods can be reconstituted by soaking them in boiling water and some things, like herbs and leafy greens, don't even need to be soaked. Simply add them to anything that contains hot water and they'll bounce right back.
Looking for a vitamin packed beverage at the end of a long hike? Dehydrate some spinach or my favorite spicy green, arugula, break it up, and add it to warm water for a nutritious trailside tea. Want to make it more like soup? Stir some powdered bullion into the water along with a couple of dried minced vegetables. Onion and parsnip come to mind.
Be careful when trying any of the above suggestions, though. Once you begin dehydrating, it's difficut to stop. Happy drying!
There are plenty of hikes in the Schroon Lake Region to bring your deydrated food on. When you're finished and ready for something more substantial, swing by one of our restaurants and treat yourself to a well-deserved meal.
The Adirondacks Spring Into Action this week:
Top tips for 3 cool activities